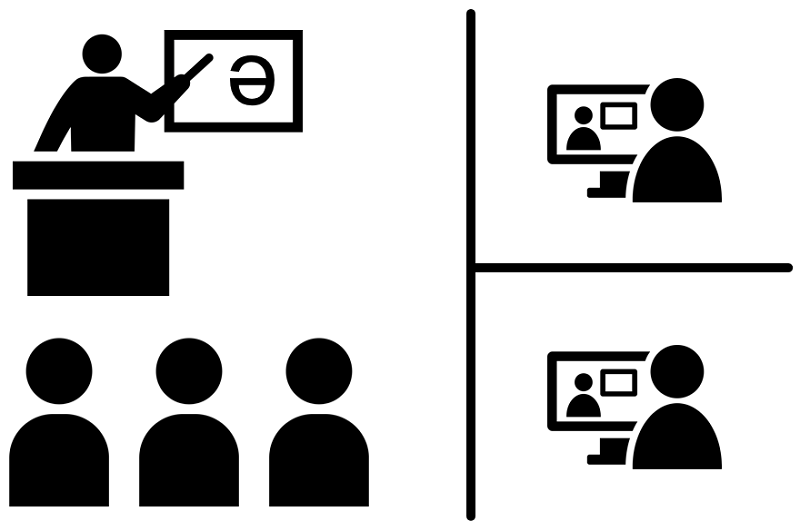
A "HyFlex class" is a class conducted simultaneously in person and online.
On this page, you will find recommended settings for conducting HyFlex classes in a variety of classrooms.
Due to the classroom renovation project in the summer of 2024, the operating procedures for the medium and large lecture rooms have changed significantly. We plan to update the information on this page, but for the time being, please refer to the manuals installed in the classrooms.
- Middle Lecture Room
- Multimedia Hall 101
- Large Lecture Room 115
- Large Lecture Room 226
- Large Lecture Room 227
- Small Lecture Room Exercise Room
- Simple setup (for easy Zoom classes)
- Advanced setting (for those who wish to enhance sound quality through participation of outside guests, exchanges with other schools, etc.)
- Omni-directional sound collection type setting with wide coverage (for large classrooms where an unspecified number of people are actively speaking)
- Prometheus Hall
- Project Space (Agora 3F)
Middle Lecture Room
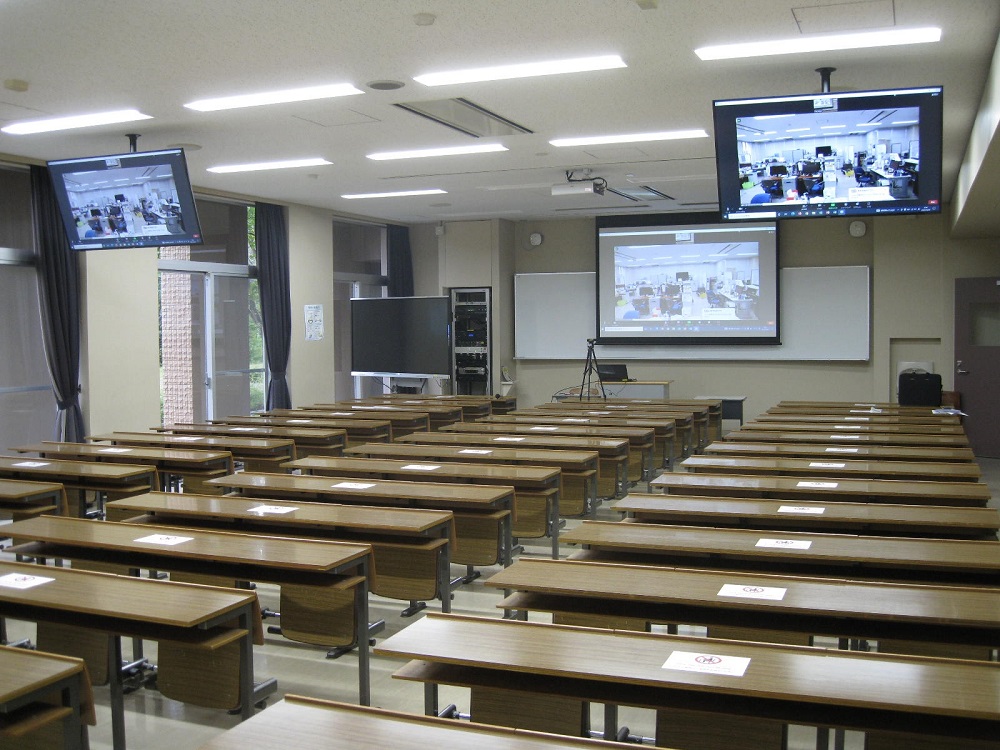
Classrooms: 102 103 107 108 109 113 114 (113 114 without ceiling monitor)
Classroom: 104 (small lecture room, but has AV racks and facilities similar to a medium lecture room)
HyFlex column symbol: 〇 AC (audio capture)
For HyFlex classes in the middle lecture hall, we recommend using an audio capture setup. Since there are relatively challenging tasks such as removing cables from the back of the classroom AV rack, please be sure to request support from the support office the first time you use the system.
Required equipment
AV rack key, keyaudio capture, ,Webcam or PTZ Camera
Setting Procedure
- Open the AV rack with the key and take out the RCA cables stored in the lower back inside the rack.
- Connect this RCA cable to the PC via an audio capture.
- Connect the HDMI output of the PC to the HDMI cable prepared in the rack.
- After launching Zoom, select Speaker: HDMI Out, Microphone: Audio Capture, and (The device names will vary depending on your PC)
- To be sure, test the microphones and speakers in the Zoom to confirm that there are no problems with the sound settings.
This setup uses the classroom's wired or wireless microphones, which are less noisy and have higher sound quality. However, any speech not using a microphone will not be heard on the Zoom side. The speakerphone setting is better suited for classes where an unspecified number of people can speak freely. See also.SP
Multimedia Hall 101
Classroom: 101
HyFlex column symbol: △/★ 101
Multimedia Hall 101 requires separate video and audio capture for HyFlex classes. In addition, although a ceiling camera is permanently installed, it has a structural problem in that it reflects the lighting fixtures and hides about 20-30% of the top of the screen, so a separate camera on a tripod is required depending on the content of the event. Because of the difficulty of setting up the camera, please be sure to request support from the support office for the initial setup.
Required equipment
audio capture, ,PTZ Cameratripod
Setting Procedure
- Take out the RCA and USB cables for Zoom distribution from the bottom of the rack under the teaching table.
- The USB cable connects directly to the PC, while the RCA cable connects to the PC via an audio capture.
- After launching Zoom, select Speaker: HDMI Out, Microphone: Audio Capture, Camera: HDMI Capture. (device names may vary depending on your PC)
- To be sure, test the microphones and speakers in the Zoom to confirm that there are no problems with the sound settings.
This setup uses the classroom's wired or wireless microphones, which are less noisy and have higher sound quality. However, any speech not using a microphone will not be heard on the Zoom side.
Large Lecture Room 115

Classroom: 115
HyFlex column symbol: ★ 115
Large Lecture Room 115 is a classroom suitable for online classes because the ceiling camera can be used as the transmitting video, eliminating the need to bring in a separate PTZ camera or other equipment. Be sure to ask for support from the Support Office, as setting up requires the use of an HDMI cable for transmission, which requires permission to use the Support Office.
Required equipment
Setting Procedure
- Remove the transmitting HDMI cable from the bag, which is placed at the back or near the top of the teaching table. (Permission from the Support Office is required for use. Please consult with us in advance.)
- Connect the transmitting HDMI cable to the PC via an HDMI capture.
- Connect the HDMI output of the PC to the video and audio IN of the classroom equipment using an HDMI cable for normal classroom use.
- After launching Zoom, select Speaker: HDMI Out, Microphone: HDMI Capture, Camera: HDMI Capture. (device names may vary by PC)
- To be sure, test the microphones and speakers in the Zoom to confirm that there are no problems with the acoustic settings.
This setup uses the classroom's wired or wireless microphones, which are less noisy and have higher sound quality. However, any speech not using a microphone will not be heard on the Zoom side. The speakerphone setting is better suited for classes where an unspecified number of people can speak freely.
Large Lecture Room 226
Classroom: 226
HyFlex column symbol: △/★ 226
Setting up in Large Lecture Room 226 is extremely challenging as it requires temporary rewiring of classroom equipment. If possible, we recommend changing the classroom to 115 or 227, which are of similar size, but if you are forced to implement the project in 226, be sure to request support from the Support Office.
Required equipment
yamaha yvc-1000, ,YVC-1000 connector setRCA-RCA cables, RCA-RCA cables, RCA-RCA cables, RCA-RCA cablesDynamic microphone with switch, ,Wireless Microphone Set, ,PTZ Cameratripod
Setting Procedure
- In advance, download the YVC-1000 configurator to the PC for distribution and set the internal settings of the YVC-1000 to appropriate values.
- In the rack under the teaching table, unplug the XLR jack of the venue's wired microphone from the rack and connect it to the YVC-1000's AUDIO IN using the XLR-RCA cable from the YVC-1000 connector set.
- Similarly, in the rack under the teaching table, unplug the venue's RCA jacks from AUDIO IN, insert RCA-RCA cables in their place, and connect them to the YVC-1000's AUDIO OUT.
- Set up the wireless microphone set at the front of the hall and connect it to the AUDIO IN of the YVC-1000 using the appropriate conversion cable of the YVC-1000 connector set.
- Install a PTZ camera at an appropriate location in the venue and connect it to a PC for distribution.
- YVC-1000 is connected to a PC for distribution.
- Be prepared to set up a YVC-1000 child unit, if necessary.
- After launching Zoom, select Speaker: HDMI Out, Microphone: HDMI Capture, Camera: PTZ Camera. (Device names will vary by PC)
- To be sure, test the microphones and speakers in the Zoom to confirm that there are no problems with the sound settings.
This setup uses the classroom's wired or wireless microphones, which are less noisy and have higher sound quality. However, any speech not using the microphone will not be heard on the Zoom side. If you have a situation in the middle of a class where an unspecified number of people are speaking freely, connect a YAMAHA YVC-1000 child unit and use the 360˚ omni-directional sound-collecting microphone.
Large Lecture Room 227
Classroom: 227
HyFlex column symbol: △/★ 227
Large Lecture Room 227 is a classroom suitable for online classes because the ceiling camera can be used as the transmitting video, eliminating the need to bring in a separate PTZ camera or other equipment. However, unlike the similarly equipped "Large Lecture Room 115," it requires temporary rewiring of classroom equipment, making the setup more challenging. Since it is important to restore the room to its original state after classes and events, please be sure to request support from the Support Office.
See also.Large Lecture Room 115
Required equipment
Setting Procedure
- Disconnect the transmitting HDMI cable for the videoconferencing system next to the teaching table at the relay terminal and connect it to the PC via an HDMI capture.
- Similarly, the RCA cable for the videoconferencing system next to the teaching table is disconnected at the relay connector and connected to the PC via an audio capture.
- Connect the HDMI output of the PC to the video and audio IN of the classroom equipment using an HDMI cable for normal classroom use.
- Once Zoom is up and running, set Speaker: HDMI Lineage, Microphone: Audio Capture, Camera: HDMI Capture.
- To be sure, test the microphones and speakers in the Zoom to confirm that there are no problems with the sound settings.
This setup uses the classroom's wired or wireless microphones, which are less noisy and have higher sound quality. However, any speech not using a microphone will not be heard on the Zoom side. The speakerphone setting is better suited for classes where an unspecified number of people can speak freely.
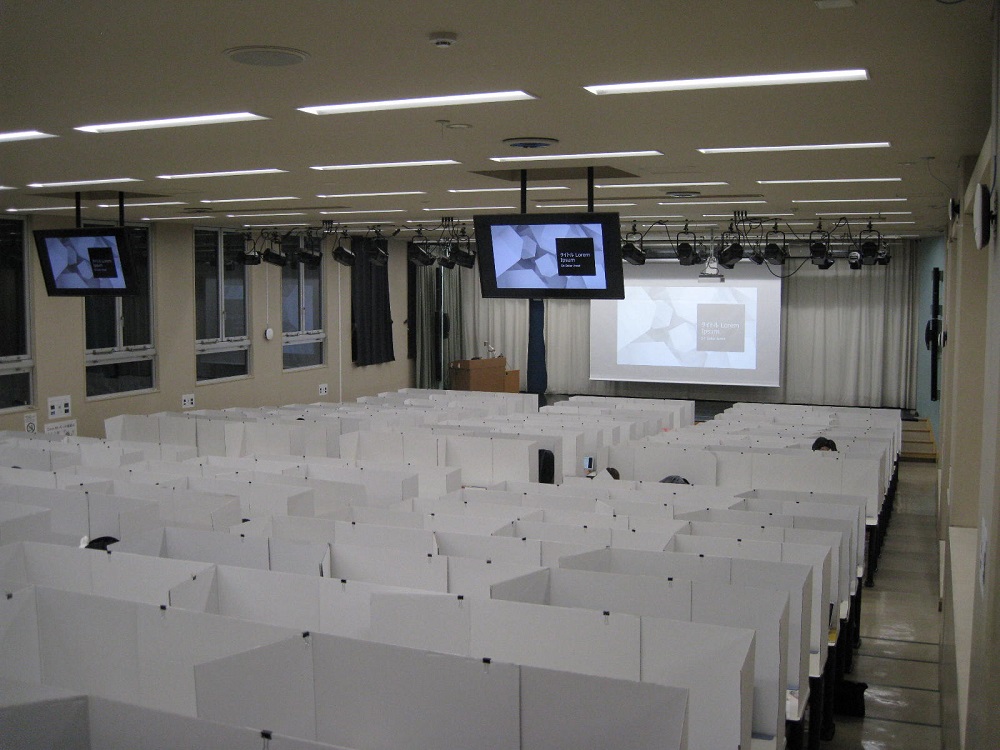
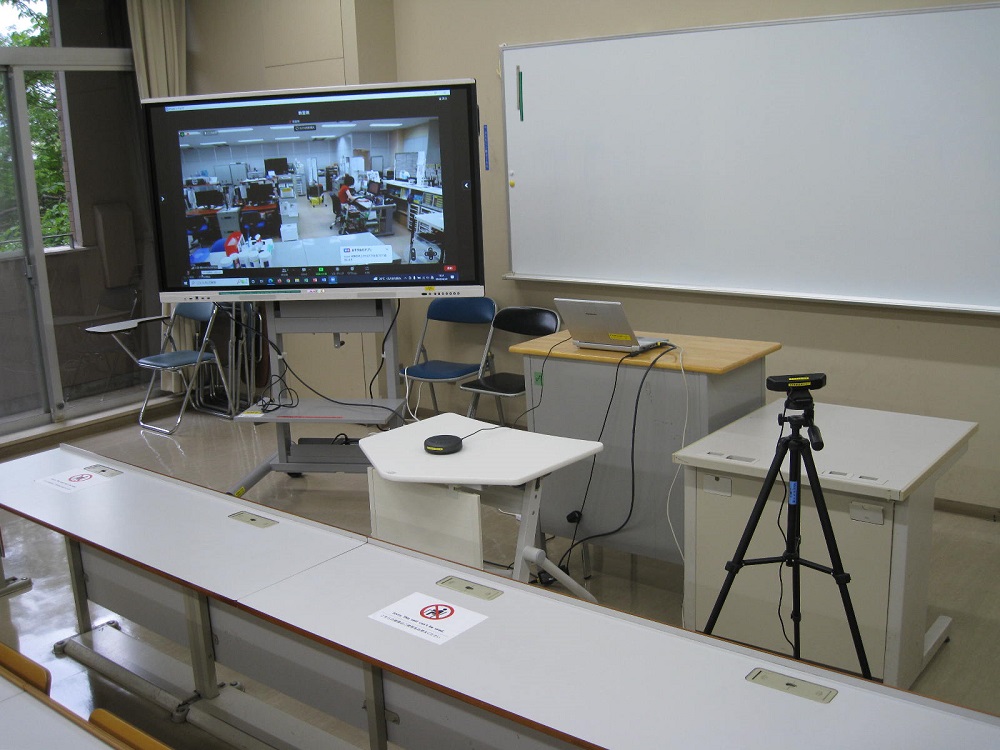
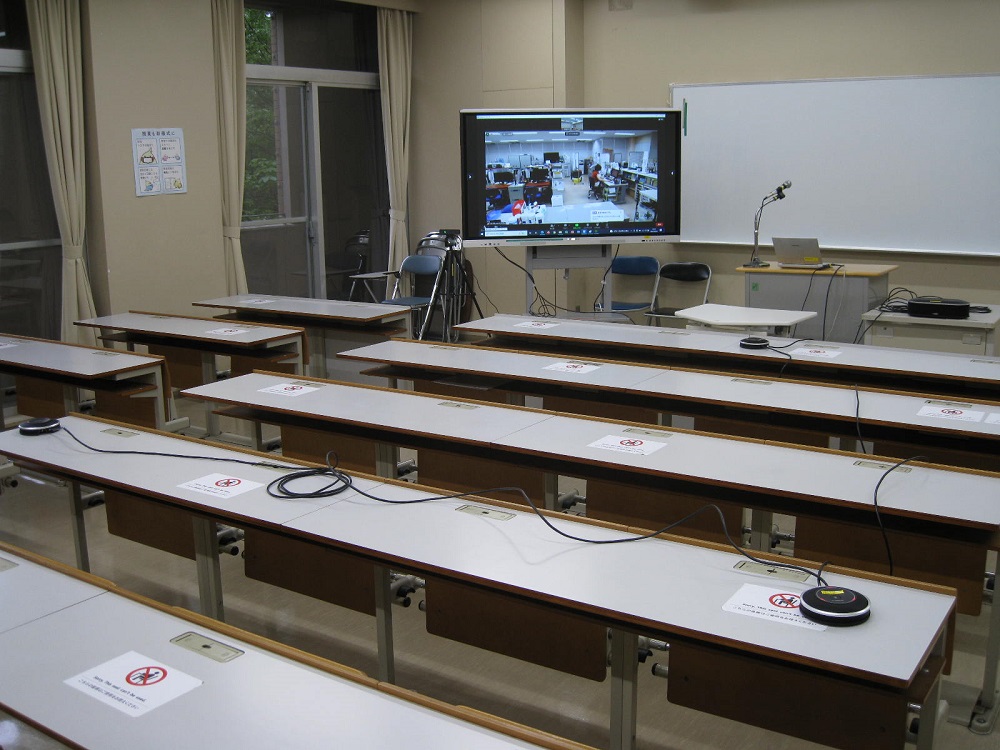
Small Lecture Room Exercise Room
Classrooms: Small lecture rooms, seminar rooms
100 104(104 facilities are close to the middle lecture room) 105 106 110 111 112 207 209 210 211 212 213 214 218 219 220 221 222 223 224 225 226 227 305 306 307 308 309 310 311 312 313 314 315 316 317 318 322 326 327 328 329 330 331 332 333 406 408 410 411 416 420 423 434 435 428 507 508 509 510 512 542 543 544 610 645 646 710 711 745 746 810 811 843 844
Simplified setting(For easy Zoom classes)
Symbol 〇 SP (speakerphone) Simplified
Setting up with the eMeet mini speakerphone is easy to prepare and hassle-free. You can set it up yourself or, if this is your first time and you are not confident, you can book support from our support office.
Required equipment
Setting Procedure
- Connect the speakerphone to a PC; a wireless connection is also possible using the USB child device on the back of the eMeet.
- Connect the PC to a classroom display device such as an electronic blackboard, TV, or LCD monitor. (Use the HDMI cable provided with the display device.)
- After launching Zoom, select Speaker: eMeet, Microphone: eMeet.
- To be sure, test the microphones and speakers in the Zoom to confirm that there are no problems with the sound settings.
This setting uses eMeet's 360˚ omni-directional sound-collecting microphones, so an unspecified number of people can speak freely on the classroom side and the Zoom side, but the sound quality is low because noise is also picked up. If you want to deliver high-quality audio to the online side, such as when external guests join online, consider the "advanced setting," which uses the YAMAHA YVC-1000 in combination with a wired or wireless microphone.
Advanced setting(If you want to enhance the sound quality by participating in outside guests, exchanging with other schools, etc.)
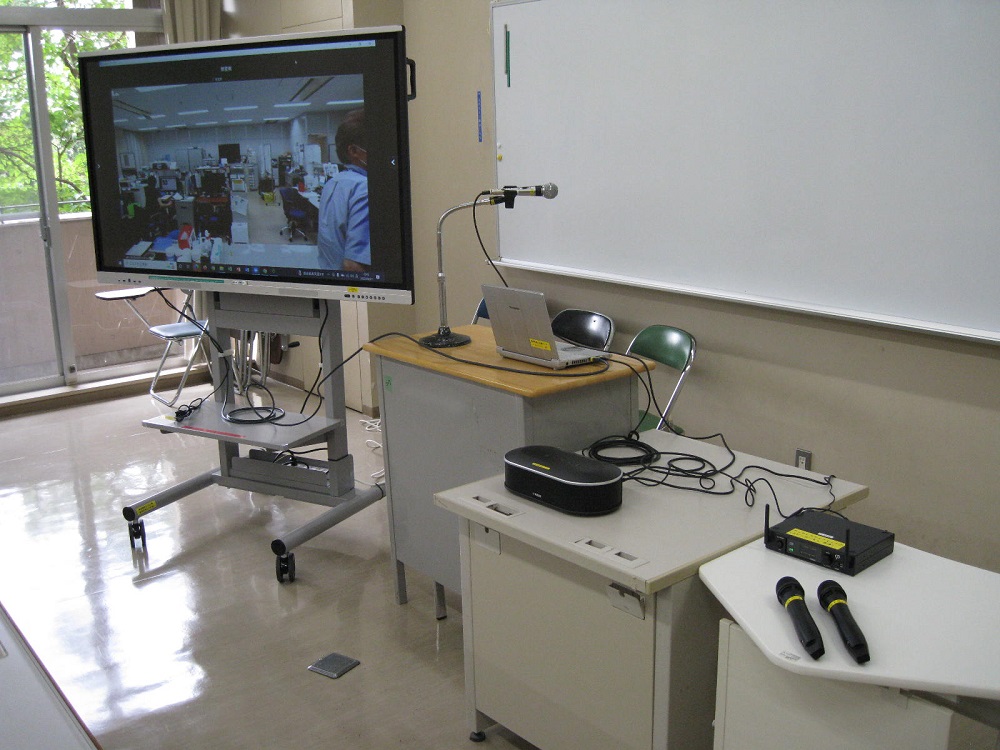
Symbol 〇 SP (speakerphone) Advanced
Setting up with the YVC-1000 allows for very high quality HyFlex classes, but the equipment is heavy, numerous, and difficult to set up. Please request support from the support office the first time.
Required equipment
Setting Procedure
- Connect the YAMAHA YVC-1000 to a PC.
- A switched dynamic microphone and a wireless microphone set are connected to the YVC-1000.
- Be prepared to connect a YVC-1000 child unit (360˚ omni-directional sound collection microphone) if necessary.
- Connect the PC to a classroom display device such as an electronic blackboard, TV, or LCD monitor. (Use the HDMI cable provided with the display device.)
- After launching Zoom, select Speaker: HDMI system, Microphone: YVC-1000.
- To be sure, test the microphones and speakers in the Zoom to confirm that there are no problems with the sound settings.
The setup using the YVC-1000 is difficult to prepare and requires advanced skills, but it can be used with a wired or wireless microphone, which reduces noise and provides high sound quality. For lively interactions, a YVC-1000 child unit can be connected to the YVC-1000 main unit to create an environment in which an unspecified number of people can speak freely, although the sound quality will be reduced by picking up noise, making it suitable for all forms of HyFlex classes.
Omni-directional sound-collecting setting with wide coverage(In a larger classroom with an unspecified number of people actively speaking)
Symbol 〇 SP (speakerphone) Wide range omnidirectional sound collection
Up to five YVC-1000 child units can be installed. This is a convenient setting for classes in which an unspecified number of people are actively speaking in a large classroom. However, it has the disadvantage of picking up noise as well. Although it is relatively easy to set up, please ask for support from the support office if you are not sure about it for the first time.
Required equipment
Setting Procedure
- Connect the YAMAHA YVC-1000 to a PC.
- A switched dynamic microphone and a wireless microphone set are connected to the YVC-1000.
- A YVC-1000 child unit (360˚ omni-directional sound-collecting microphone) will also be connected, and if necessary, additional child units for expansion will be added and arranged to cover a wider area of the classroom.
- Connect the PC to a classroom display device such as an electronic blackboard, TV, or LCD monitor. (Use the HDMI cable provided with the display device.)
- After launching Zoom, select Speaker: HDMI system, Microphone: YVC-1000.
- To be sure, test the microphones and speakers in the Zoom to confirm that there are no problems with the sound settings.
A 360˚ omni-directional microphone picks up all sounds in the classroom, including noises and private conversations, so a wired or wireless microphone setup may be more appropriate when inviting guests as online participants, for example. It is advisable to use different types of microphones depending on the type of class.
Prometheus Hall
Classroom: Prometheus Hose
HyFlex column symbol: ★ Prm (Prometheus hole only setting)
Because of the need to adjust the sound mixer in the sound control room, when holding a HyFlex class or event in Prometheus Hall, please make an appointment for support in the support room and receive a lecture on how to use the room in advance, with a rehearsal set up before the actual event.
Required equipment
HDMI Capture
Setting Procedure
- Setup should be done in the presence of the support room staff. For events on weekends and holidays, please set up a rehearsal in advance and reserve the support of the support room staff. We will give you a lecture on how to use the equipment so that you can operate it properly on the day of the event.
This setup uses the classroom's wired or wireless microphones, which are less noisy and have higher sound quality. However, any speech not using a microphone will not be heard on the Zoom side. A large screen in the hall can be used to project the participants on the online side in large size, as if they were interacting with the entire audience.
Project Space (Agora 3F)

Classroom: Project Space
HyFlex column symbol: △/〇 Pjs
In order to conduct a HyFlex class in this classroom, you will need a lot of loaner equipment. Because the setup is somewhat difficult, if you are teaching a HyFlex class in this classroom for the first time, please make an appointment for support in the support room and receive a lecture on how to use the equipment before the class.
Required equipment
yamaha yvc-1000, ,YVC-1000 connector setRCA-Phone cable, RCA-Phone cable, RCA-Phone cable, RCA-Phone cable, RCA-Phone cableWireless Microphone Set, ,PTZ CameraUSB extension cable, tripod, HDMI relay connector, HDMI cable, power extension cable
Setting Procedure
- Beforehand, the internal settings of the YVC-1000 must be set to appropriate values.
- Plug the REC OUT of the classroom's permanent wired microphone set into the YVC-1000's AUDIO IN, and similarly plug the OUT of the wireless microphone set into the YVC-1000's AUDIO IN.
- Connect the YVC-1000 and PTZ camera to the PC for distribution.
- Connect the HDMI cable that comes with the electronic blackboard to the PC for distribution.
- If you find it difficult to set up the above, please make an appointment with the support office staff for assistance.
This setup uses the classroom's wired or wireless microphones, which are less noisy and have higher sound quality. However, any speech not using a microphone will not be heard on the Zoom side. If a 360˚ omni-directional sound-collecting microphone is used to facilitate unspecified speech, multiple YVC-1000 child units can be connected to the YVC-1000 to cover a wider range of sound, since the classroom is large.